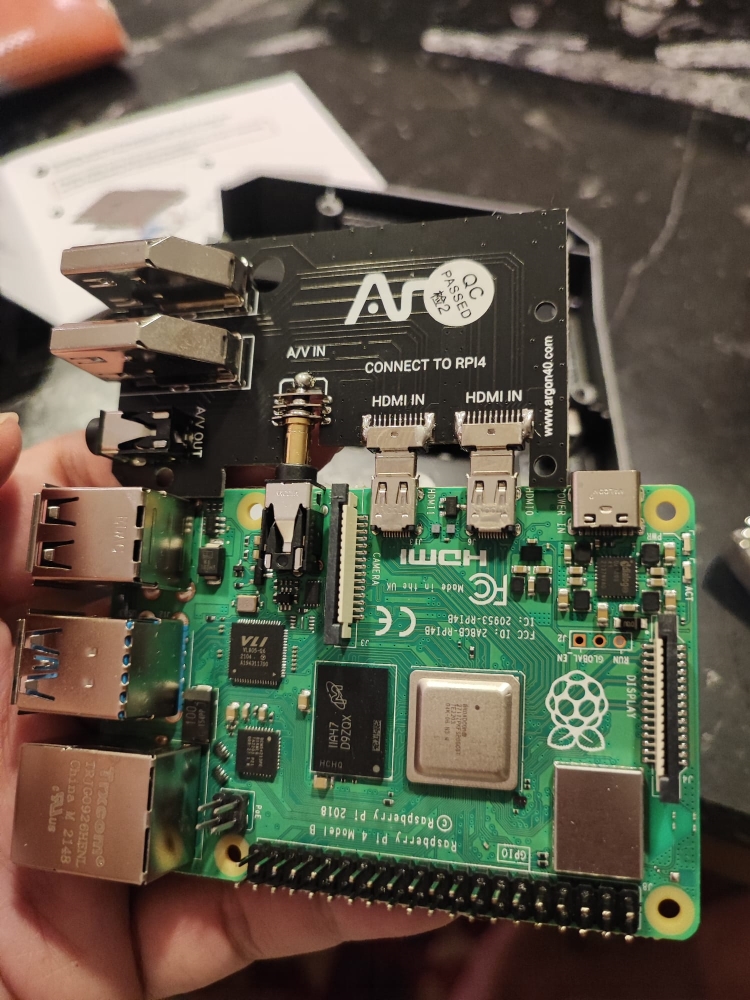
I needed a simple and elegant solution to playback digital videos for Home Movie Day 2022. I simply did not have budget for BrightSign players and I also did not want to deploy laptops onsite just to loop videos. Fortunately, Rasperry Pis came in as a great alternative.
While it was my first time using a Raspberry Pi, its set up is pretty easy. The Raspberry Pi Foundation has an easy to follow set-up guide that walks you through it. The bulk of the set-up involves loading the desired operating system into the Raspberry Pi with the help of the Raspberry Pi Imager. The Raspberry Pi Imager offers numerous operating systems, but the latest Raspberry Pi OS (64-bit) release is generally a good option.
One may utilize VLC media player in the operating system to playback media, however another option is Pi video looper that requires the ‘Buster OS’. The video looper will automatically loop videos (H264, .MP4) found in any USB stick that is connected to the Raspberry Pi. This makes it perfect for art installations, fairs, theatre, events, infoscreens, and advertisements etc. What I like about it is its capability to automatically detect a new USB stick and its contents when it is hot swapped. This allows change of content on the fly.
The entire screen will turn black with a prompt: “Insert USB drive with compatible movies. press ESC to quit” after installation. Now its time to plug in your USB stick with your videos! Enjoy!
Full written guide here.
YouTube video guide here.
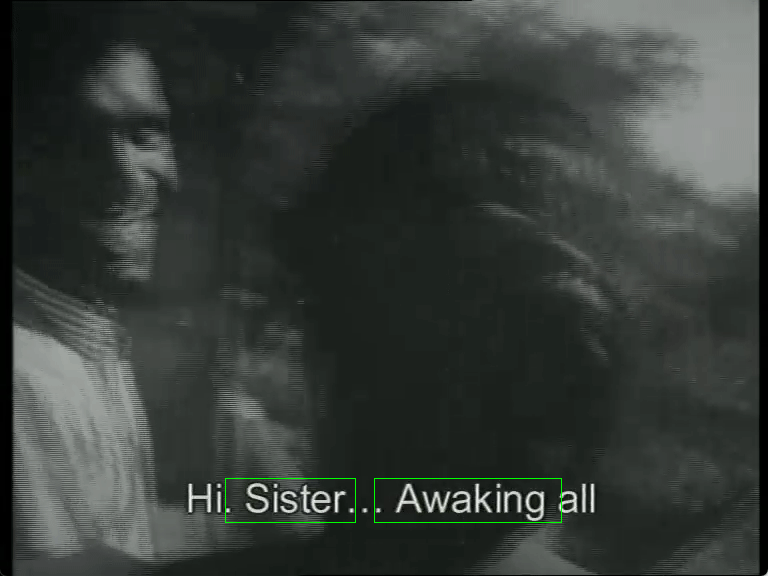
I recently tinkered with Torbjørn Pedersen’s (National Library of Norway) Python script video-ocr2srt to extract burnt-in English subtitles from a digital video. The script performs optical character recognition (OCR) on video files and generates a .srt subtitle file with a detailed JSON file.
The script leverages on the EAST text detector model for text detection and the Pytesseract library for OCR. I achieved decent results with it, which may improve with a better quality video file. I suspect the extremely poor transfer of the film may be the cause of numerous duplicate lines and inclusion of stray special characters in the subtitles. But what it does so well is the heavy lifting creating the in and out points for the subtitle lines ╰(°▽°)╯! It processed a 110 minute video under 40 minutes, however users will need to ‘clean’ the .srt file for spelling, grammar, punctuation, and timing after.
PyTesseract is a widely used open-source OCR engine for Python that read and recognizes text in images. It determines text lines that are fixed pitch and slices the words into characters based on the pitch. While it is known for its accuracy and versatility, it can be challenging to install it in a Windows environment.