Ubiquiti Home Network Part: I
This post will be part of a series documenting the network setup of my new apartment. The apartment is over 20 years old hence a major overhaul is required and the renovation is a great opportunity to lay CAT6A in the house for the 1Gbps/10Gbps network 🤓.
My research began with this article on patnotebook.com detailing the conversion of telephone points to RJ45 data points in newer BTO (Build to Order) flats in Singapore. Newer flats in Singapore have CAT6 cables already nicely laid in the house, however many of the points are terminated with a telephone jack instead of RJ45. Based on the article, it seems that BTO flats only have one point terminated as RJ45, which is definitely not enough 😁.
Older resale flats like mine do not come with any data points hence I will have to lay my own cables and design my own network infrastructure from scratch. On top of patnotebook.com, I’ve relied on many youtube videos and blogs to learn basic networking concepts and the different components required to run a network.
I’ve devoured Evan McCann’s tech blog since I plan to purchase Ubiquti hardware for the network. There are many nice articles that explain networking jargon in simple terms and breaks down the Ubiquiti universe in sizeable chunks. He is extremely detailed in doing breakdowns and making comparisons on the many Ubiquiti products as well. I would recommend his site as essential reading for whoever is considering putting together a Ubiquiti system!
Recommended McCann reading list
- Ubiquiti’s UniFi Ecosystem Explained
- UniFi Switches Explained
- UniFi Switch Comparison and Buyer’s Guide
- UniFi Wireless Access Point Buyer’s Guide
- Wi-fi: Isn’t Magic Some Tips For Planning A Home Network
- Ubiquiti FAQ
I plan to update my progress with subsequent posts, but for now I’ve made a simple diagram detailing the essential hardware required for the network setup.
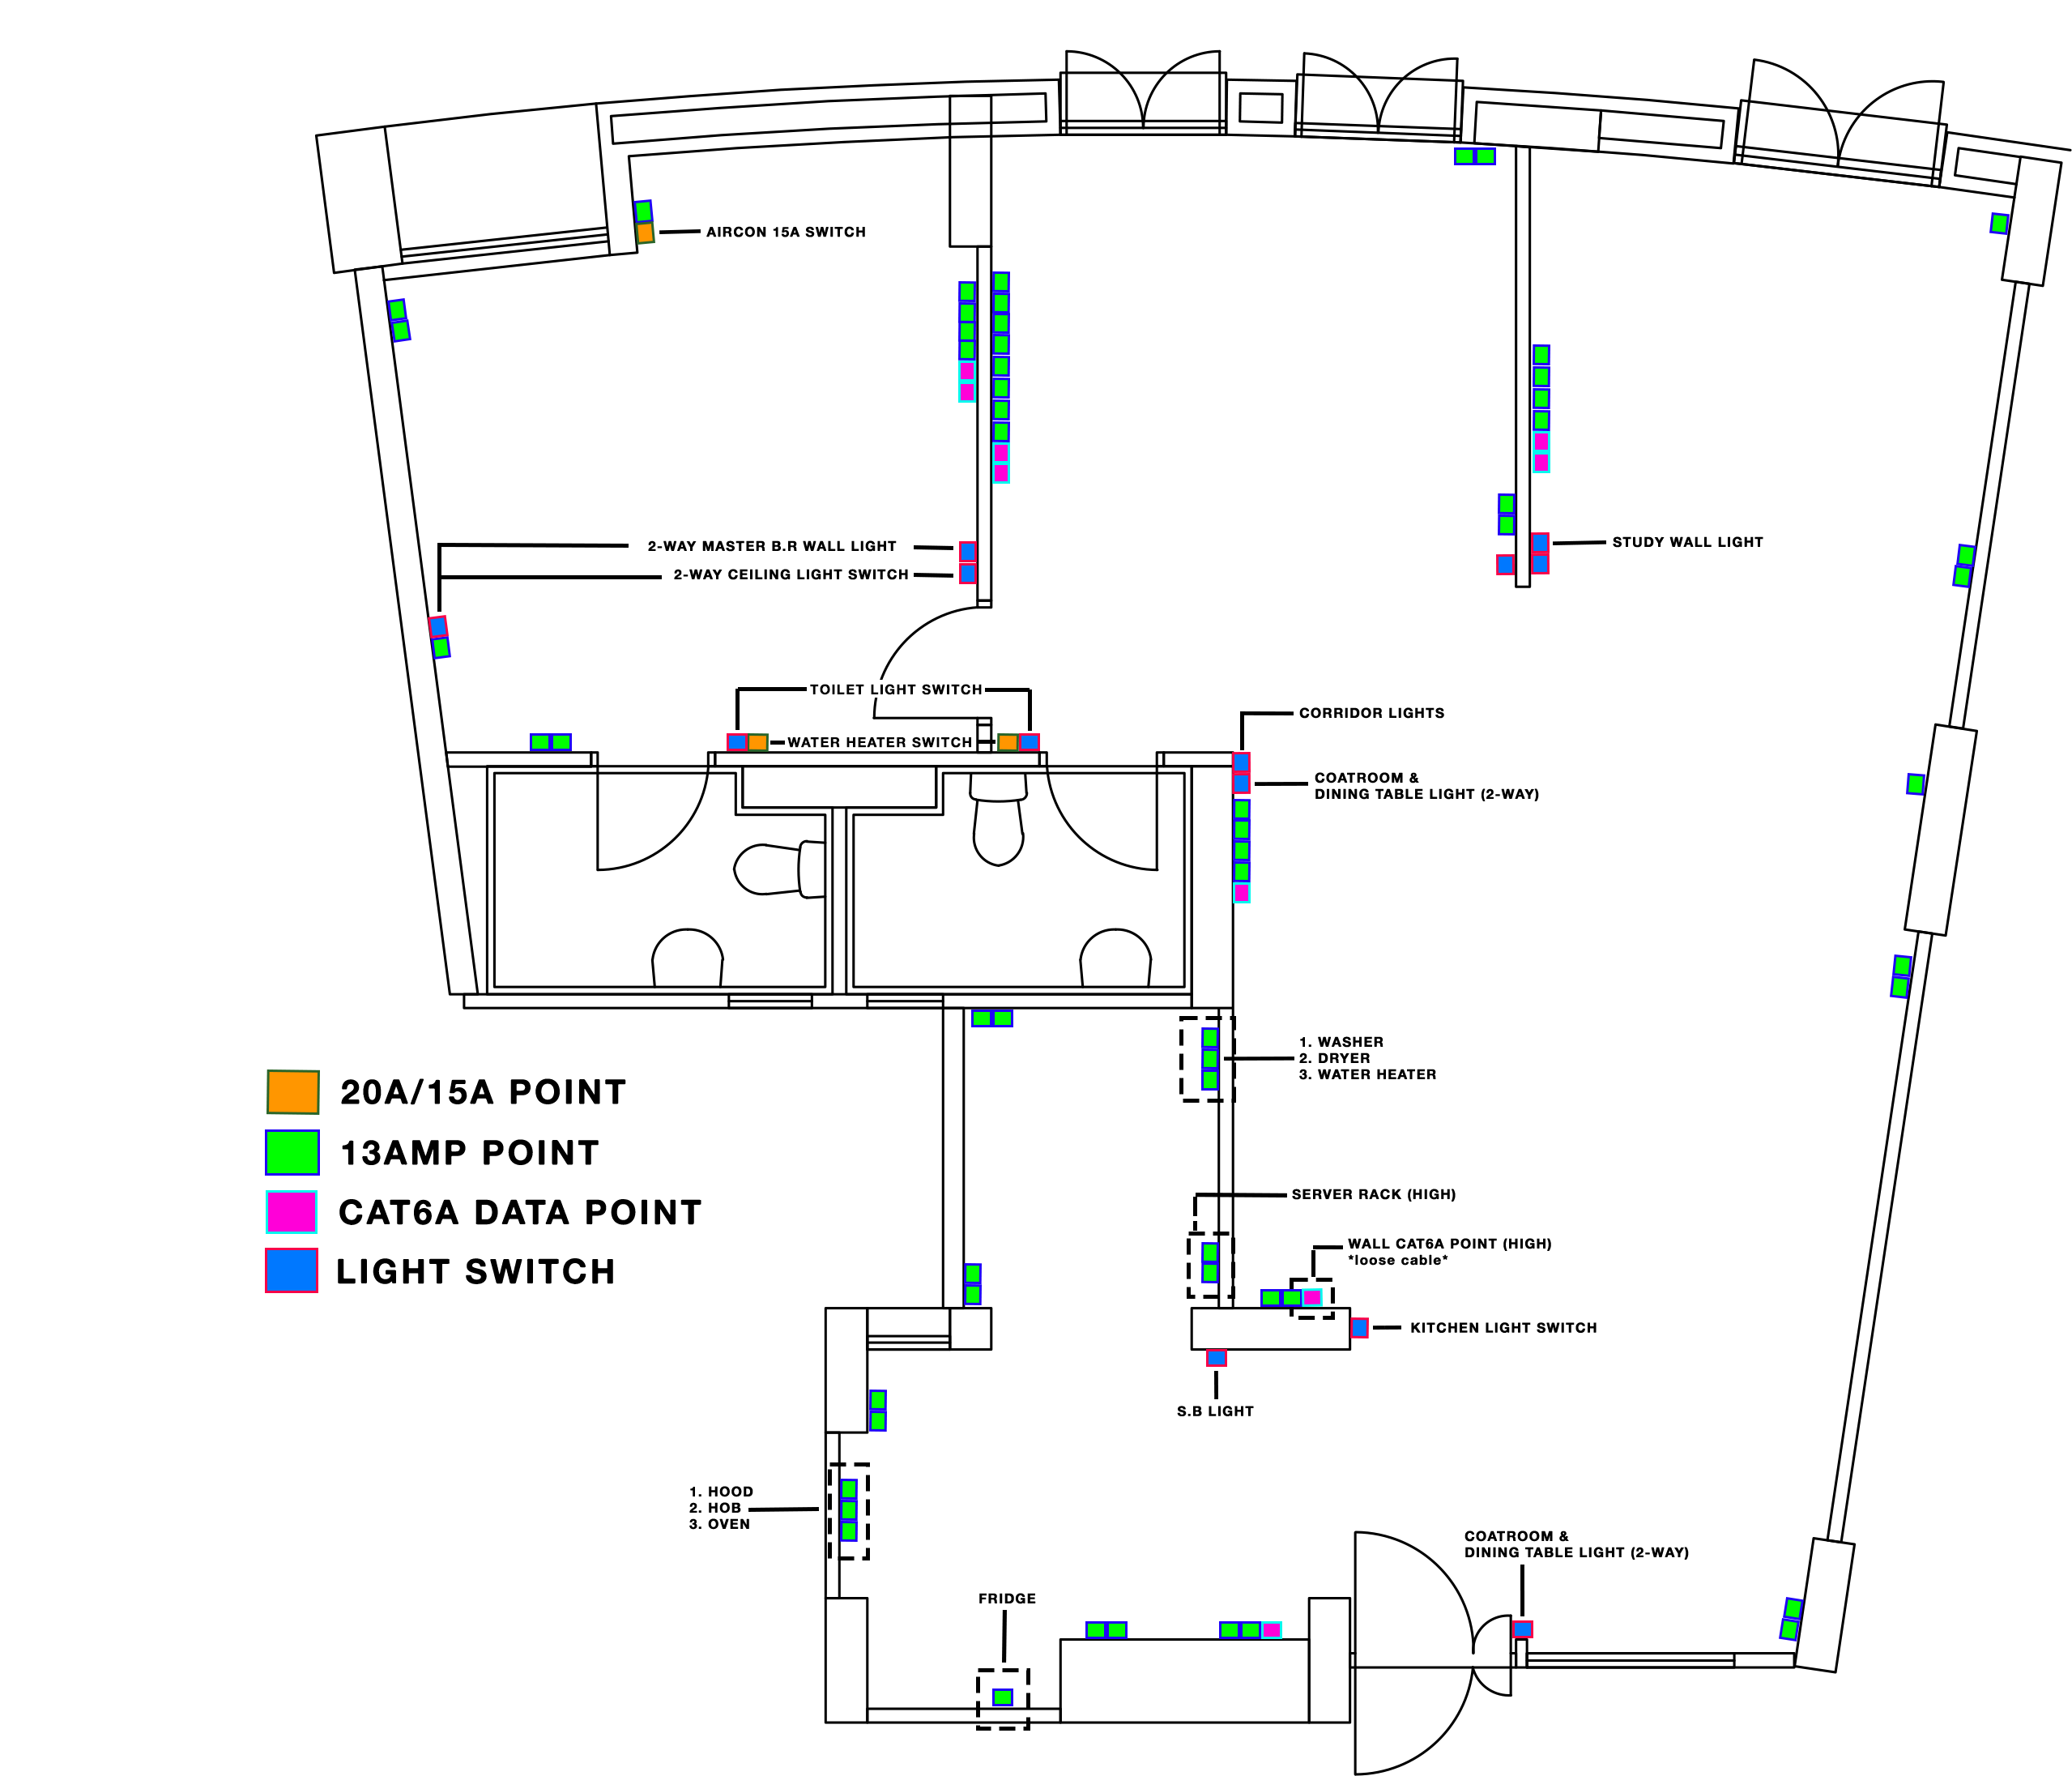
The electrical layout
The hardware diagram and breakdown
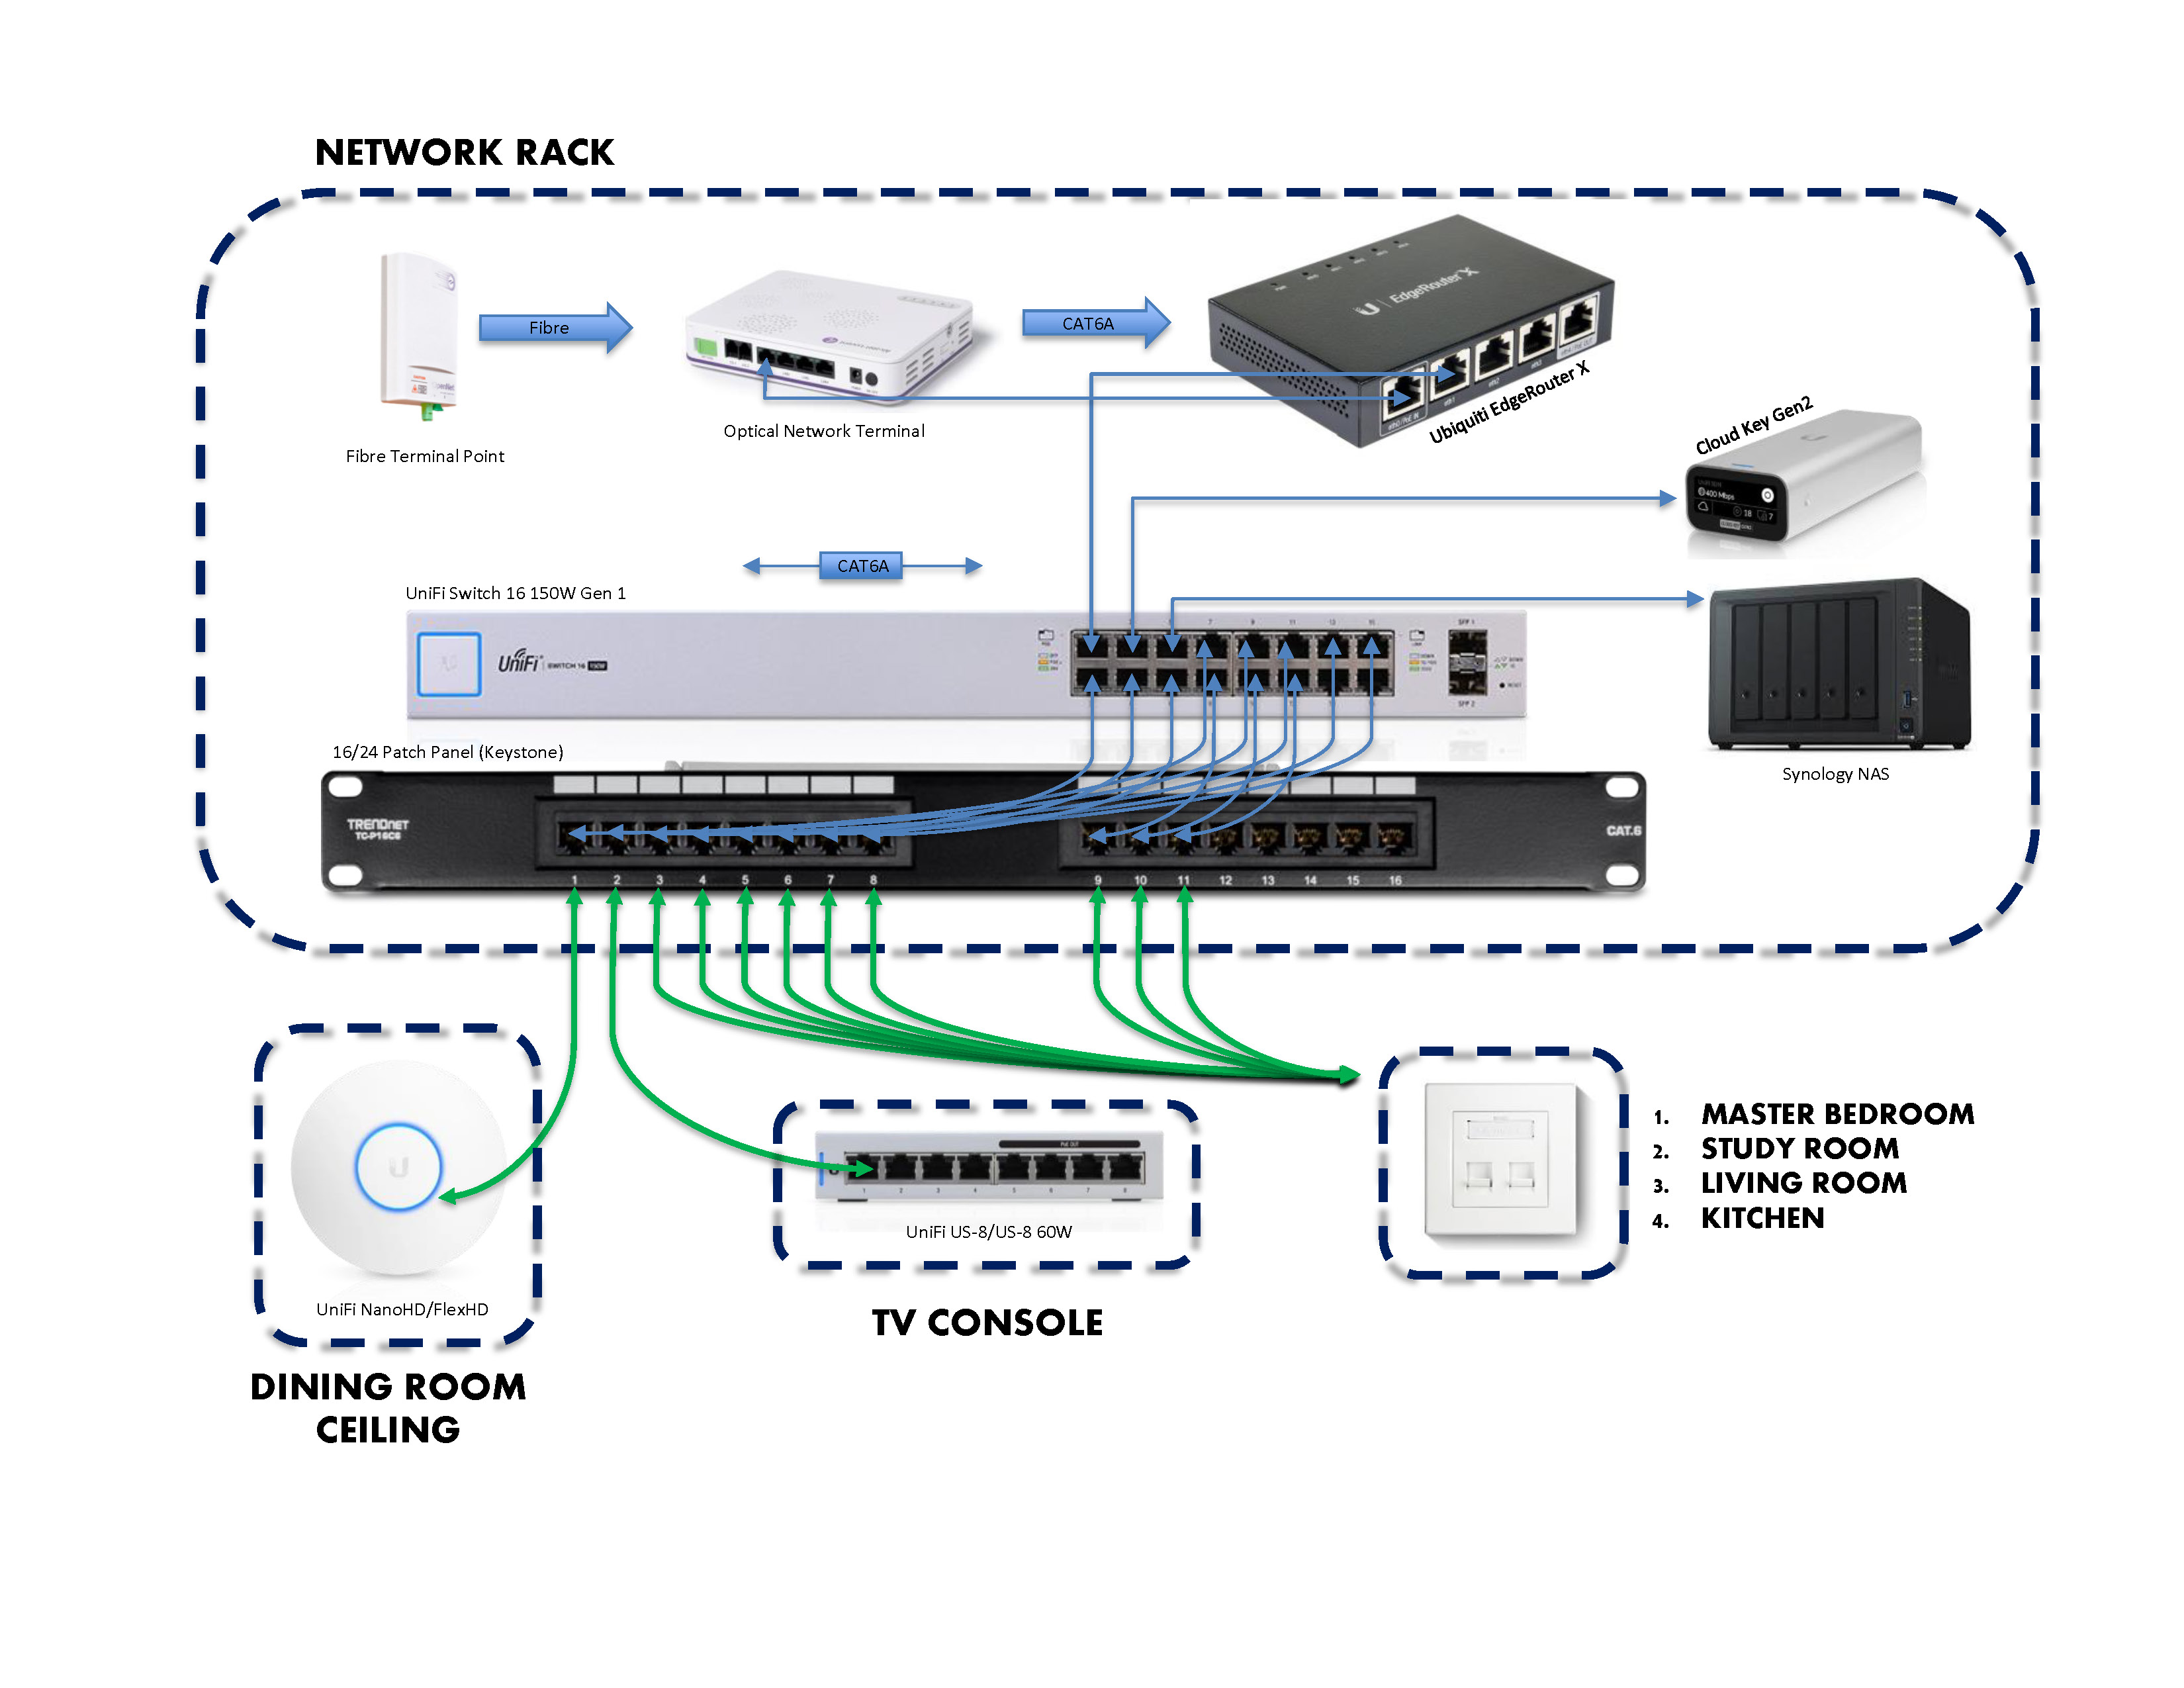
- Belden CAT6A 10GXE02
- 6U wall-mount Server Rack
- 24-Port Keystone Patch Panel
- Ubiquiti EdgeRouter X (ER-X)
- Unifi Switch 16 150W Gen 1
- Unifi Cloud Key Gen2 Plus (UCK-G2-PLUS)
- Unifi NanoHD (UAP-nanoHD)